
Creating a Wall Gallery From Your Family Session
You have done all the work to schedule and execute the family photo session, and you have the digital files on your computer. What are you going to do now? I hope you are going to print them! Get them off the computer and showcase the gallery in your home.
A wall gallery is a wonderful way to display your images. You are using your own family as art to decorate and beautify your home. You get to enjoy these precious images every day and showcase your favorites to family and friends. Creating a wall gallery takes a little planning, but it is totally worth it in the end. Here are a few suggestions to get you started.
1. FIND WALL SPACE. It can be anywhere! The hallway, along the stairs, in the family room. Anywhere will do.

2. HOW ARE YOU GOING TO FILL THE SPACE?
Are you creating a gallery you will add to over time? Is it a gallery dedicated to the most recent photo session? In my home, I have a few different walls where I showcase arrangements of family pictures. The area on our stairs is a mixture of family milestones with images of varying sizes. In addition, each frame has a different texture and shape, some have a matte others do not. I just make sure each frame is black to help unify the gallery.
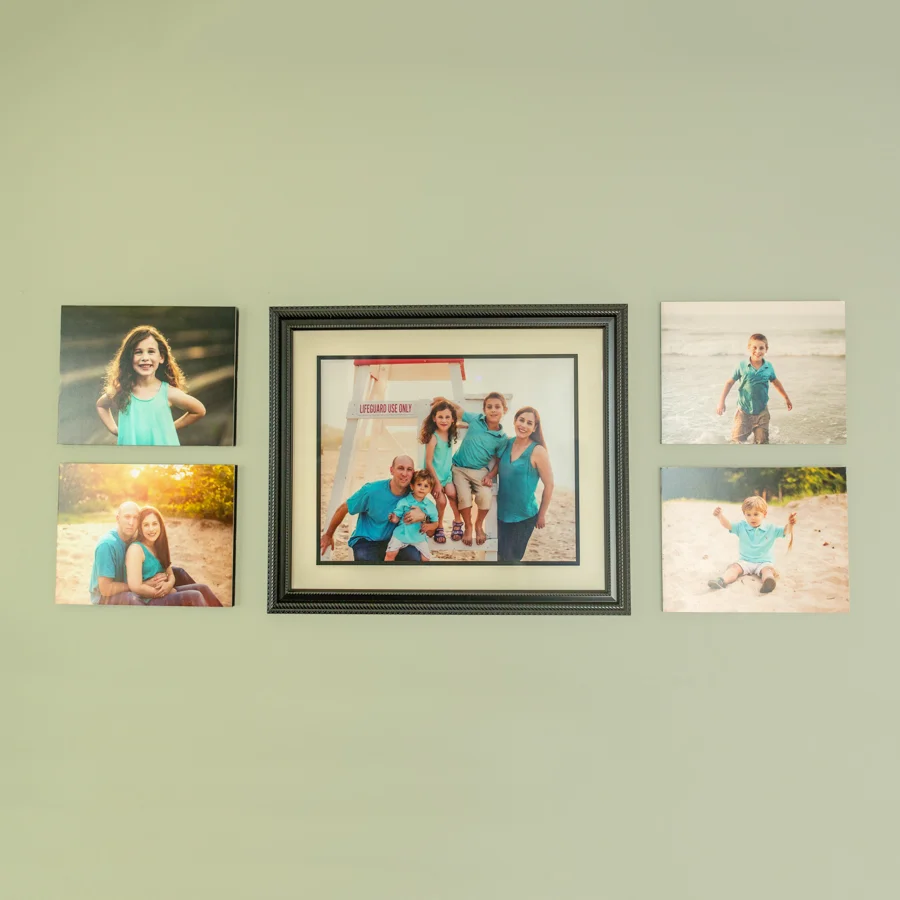
On other walls, I have one large single image to fill the space. Or, I have 3-5 images from one family session to create a wall gallery. These are very uniform in frame color and style, but differ in sizes.
3. TAKE MEASUREMENTS: Identify the overall space you would like to fill. Depending on the number of images you would like to use, you will have a number of options for how you can arrange your pictures. When I work with clients to help plan wall galleries, I use a great program to plan and visualize the various options for size, shape and spacing on the wall.
3. CHOOSE YOUR FAVORITE IMAGES: what images do you want to showcase? Include a family image, individuals of the kids, one of kids together, maybe a couple shot of mom & dad.
4. CANVAS or FRAMES? Maybe do a combination of the two.

5. STYLE & VARIETY: If you are going with framed prints, you can have some fun with the frames. You might want to be very uniform and select the exact frame for all images, you could add more variety by selecting a color for your frame, but mixing up the texture and shape. You can also add decorative elements to your wall gallery to help tie into the decor of your home.
6. FRAME YOUR PRINTS: The price range here can vary. Are you going to buy ready made frames and do it yourself or are you going to have them custom framed? Check out the option of purchasing ready made frames and having the custom framing department prepare your prints for hanging on the wall. Home good stores such as JOANN Fabric, Hobby Lobby or Michaels are perfect to compare options and prices.
7. HANGING THE GALLERY: Layout the gallery on the floor to visualize how you want the spacing between each image. Get out a pencil and tape measure to make sure the pictures are centered and spaced correctly.
However you choose to display your family pictures is up to you and your style. Just get them off the computer and in your home!